


Keratin Bond Removal: Safe Steps for Healthy Hair
Keratin bond removal is the process of safely dissolving and detaching keratin-bonded hair extensions without damaging your natural hair. Done correctly, it protects your roots, preserves your hair’s strength, and leaves your scalp clean and ready for what comes next. Done wrong, it causes breakage that can take months to recover from. This guide covers every step of the process, from gathering the right tools to the final conditioning treatment, so you finish with your natural hair fully intact.
What tools do you need for keratin bond removal?
The right tools make the difference between a clean removal and a damaging one. Gather everything before you start. Stopping mid-process to search for a comb or clip increases the risk of pulling on unsoftened bonds.
| Tool or Product | Purpose |
|---|---|
| Keratin bond remover solution | Dissolves the keratin adhesive so bonds crack cleanly |
| Keratin removal pliers | Crush the softened bond without gripping natural hair |
| Fine-tooth comb | Separates shed hairs and removes residue after bonds are out |
| Sectioning clips | Keep hair organized and prevent tangling during removal |
| Clarifying shampoo | Strips leftover remover solution and keratin flakes from the scalp |
| Deep conditioner | Restores moisture and strength after the clarifying wash |
| Microfiber towel | Absorbs moisture without roughing up the cuticle |
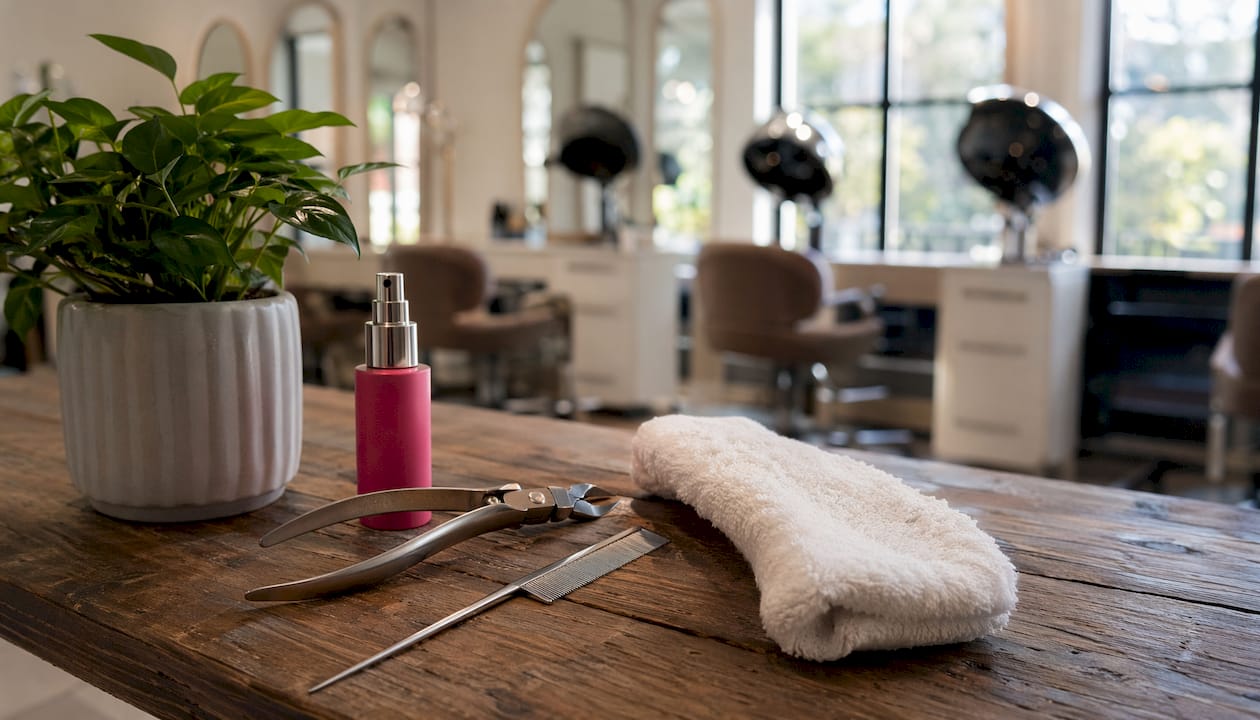
Alcohol-based keratin bond removers break down bonds quickly and leave no oily residue, but they do strip moisture from the hair shaft. Plan to follow up with a deep conditioning treatment every time you use one. Oil-based removers work more slowly but are gentler on dry or color-treated hair.
Specialized stainless steel pliers with shaped tips are designed to crush only the bond, not the surrounding hair. Household pliers have flat, wide jaws that grip everything in their path, including your natural strands. Never substitute them.
Pro Tip: Set up your workspace near a mirror with good lighting. You need to see exactly where the bond ends and your natural hair begins before you apply any pressure with the pliers.
How do you remove keratin bond hair extensions step by step?
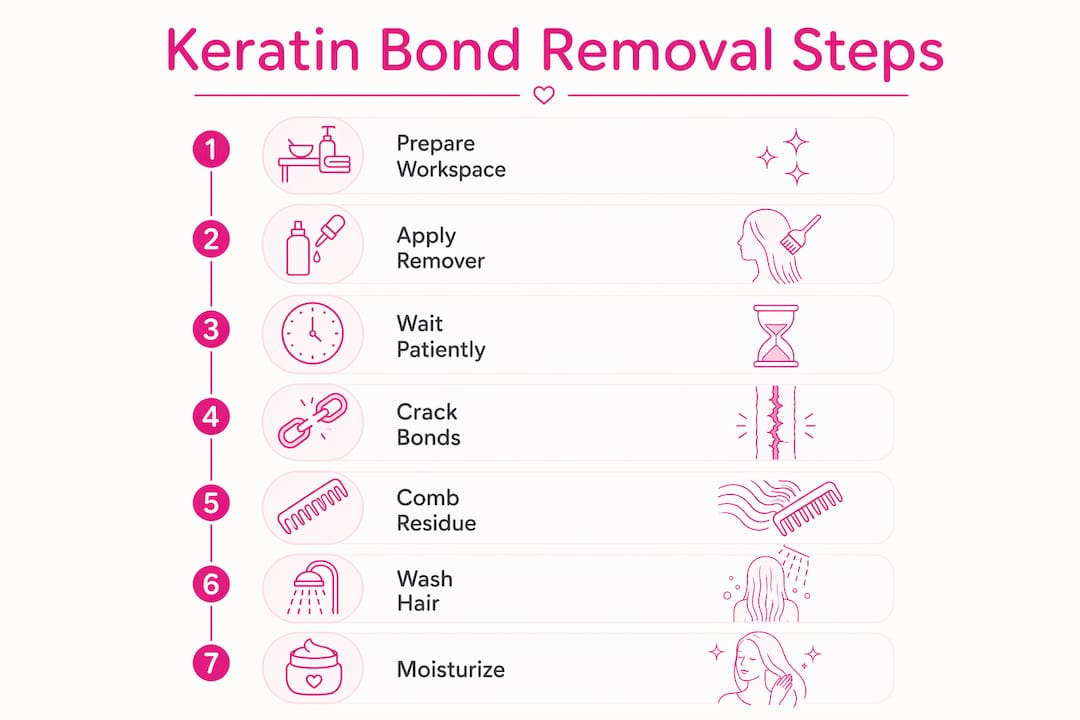
The “crack and slide” technique is the industry standard for keratin extension removal. Hair breaks near zero when this method is applied correctly, with pressure directed only at the bond itself and never at the root. Follow these steps in order.
-
Section your hair. Clip the top layers away and work from the nape of the neck upward. Small sections give you full visibility of each bond.
-
Detangle before you apply remover. Detangling matted hair at the roots before applying any chemical remover prevents the matted hair and keratin from fusing into a solid mass. Use your fingers first, then a wide-tooth comb, working from the ends toward the root.
-
Separate shed hairs from the bond. Natural hairs shed daily and collect inside the bond over time. Separating these shed hairs before you apply the pliers makes the root area clear and prevents snagging. Use a fine-tooth comb or your fingernail to gently pull them free.
-
Apply the keratin bond remover. Saturate the bond fully with your chosen solution. Hold a small piece of foil or cotton beneath the bond to catch drips and keep the remover concentrated on the adhesive. Wait the time listed on your product, typically 1–3 minutes.
-
Crack the bond with removal pliers. Position the plier tips directly on the bond, not on the root. Squeeze firmly once. The bond should crumble or flatten. If it does not, apply more remover and wait another minute before trying again.
-
Slide the extension out. Grip the extension strand just below the cracked bond and slide it downward with steady, even pressure. Never yank. Removing extensions too quickly or without proper softening leads to breakage. If the bond resists, it needs more remover, not more force.
-
Check the root. After each extension comes out, inspect the root for any remaining adhesive or shed hairs caught in the area. Address these before moving to the next bond.
-
Repeat for every bond. Work methodically through each section. Rushing this stage is the most common cause of damage. Give each bond the same attention regardless of how many you have left.
Pro Tip: If a bond feels stuck after two applications of remover, try warming it gently with a hair dryer on low heat for 10–15 seconds. Heat softens keratin adhesive and makes cracking significantly easier.
The full removal process for a standard set of keratin bond extensions takes 2–4 hours. That timeline is not a flaw in the method. It reflects how careful, tension-free work actually protects your hair.
How do you remove keratin residue and care for hair after removal?
Removing the extensions is only half the job. Keratin residue cleanup with a fine-tooth comb and clarifying shampoo is what completes the process and protects your hair long-term. Skipping this step leaves adhesive flakes on the shaft that cause tangling, dullness, and root breakage over the following weeks.
Work through each section with a fine-tooth comb before washing. Comb from mid-shaft to root in short strokes to lift any remaining adhesive off the hair. This step takes patience, but it prevents the clarifying shampoo from having to do all the heavy lifting.
Wash with a clarifying shampoo twice. The first wash removes the bulk of the remover solution and loose keratin flakes. The second wash clears what the first one missed. Clarifying shampoos are stronger than everyday formulas, so limit their use to removal days only.
A post-removal routine of clarifying shampoo followed by deep conditioning restores moisture and removes all residual product. Apply a deep conditioner from root to tip, leave it on for at least 20 minutes under a shower cap, then rinse with cool water to seal the cuticle.
Post-removal hair care checklist:
- Comb out all visible adhesive residue before washing
- Clarify twice with a sulfate-based clarifying shampoo
- Deep condition for a minimum of 20 minutes
- Avoid heat styling for at least 48 hours after removal
- Use a protein treatment the following week if hair feels weak or stretchy
- Check the Hairlockshairextensions care sheet for ongoing maintenance guidance
Pro Tip: Coconut oil applied to stubborn adhesive patches before combing helps lift residue without roughing up the cuticle. Leave it on for five minutes, then comb through before shampooing.
What mistakes should you avoid during keratin bond removal?
Most damage from keratin extension removal comes from impatience, not from the process itself. Knowing what to avoid is as protective as knowing what to do.
The most common errors are:
- Pulling bonds out without softening them first. This tears natural hair from the root and causes breakage that shows up as short, broken strands around the hairline.
- Using household pliers. Flat-jaw pliers grip everything in their path. They crush natural hair alongside the bond and cause mechanical damage that no conditioner can fix.
- Skipping the detangling step. Neglecting matting near the roots before removal is one of the most common mistakes among people doing this at home. It turns a manageable bond into a knotted mass.
- Leaving residue on the hair. Skipping residue removal causes tangling and root damage in the weeks that follow. The process is not finished until the hair is clean.
- Rushing through multiple bonds at once. Applying remover to several bonds simultaneously and then trying to remove them all at speed leads to uneven softening and forced removal.
Safety rule: If a bond does not release after two full applications of remover and one application of gentle heat, stop and consult a professional. Forcing a stubborn bond is the fastest way to cause significant breakage. No extension is worth damaging the hair underneath it.
How to handle a stubborn bond safely: apply remover, wait the full recommended time, warm with a hair dryer on low for 10–15 seconds, then try the pliers again. If it still resists, leave it and book a salon appointment. A trained stylist can assess whether the bond has fused with natural hair and address it without causing further damage.
Key Takeaways
Safe keratin bond removal requires the right tools, a patient technique, and a thorough post-removal cleanup to protect your natural hair from breakage and residue damage.
| Point | Details |
|---|---|
| Use specialized pliers only | Household pliers damage natural hair; stainless steel removal pliers protect it. |
| Detangle before applying remover | Matted roots fuse with keratin if not combed out first, making removal far harder. |
| Crack and slide, never pull | Apply pressure only to the bond; slide the extension out with steady, even force. |
| Clean up residue completely | Clarify twice and deep condition after every removal to prevent tangling and breakage. |
| Stubborn bonds need professional help | Forcing a bond that won’t release causes more damage than leaving it for a stylist. |
What 30 years of extension work taught me about removal
The removal process reveals everything about how extensions were applied and maintained. When I see a clean removal with minimal residue and zero breakage, I know the client followed a proper care routine throughout the wear period. When I see matting, fused bonds, and snapped strands, I know shortcuts were taken somewhere.
The biggest mistake I see from people attempting removal at home is treating it like a quick task. They budget 20 minutes and then panic when the first few bonds take longer than expected. That panic leads to pulling, and pulling leads to breakage. The process takes as long as it takes. Rushing it costs you hair you cannot get back.
My honest advice: if you have more than 50 bonds, or if your extensions have been in longer than the recommended wear period, book a professional removal. The cost of a salon appointment is far less than the cost of repairing breakage. Hairlockshairextensions offers professional removal services with the kind of attention to detail that protects your hair at every stage.
Post-removal care is also where most people underinvest. One wash and a quick conditioner is not enough. Your hair has been under tension and wrapped in adhesive for weeks or months. It needs a real recovery routine, starting with a deep conditioning treatment and continuing with weekly protein treatments for at least a month. Treat the removal day as the start of a recovery phase, not the end of a process.
— HairLocks
Professional keratin bond removal support at Hairlockshairextensions
Hairlockshairextensions works with clients across Australia who want expert removal and a clear plan for what comes next.

Whether you want a professional to handle the full removal or you need guidance on the right aftercare products, the team at Hairlockshairextensions is ready to help. Founder Michele brings 30 years of hands-on experience to every consultation, so you get advice grounded in real results, not guesswork. Check the removal and service pricing to book your appointment, or browse the before and after gallery to see what a professional removal and reinstall actually looks like.
FAQ
What is the safest method for keratin bond removal?
The “crack and slide” technique is the safest method. It uses specialized removal pliers to crush only the bond, then slides the extension out with steady pressure rather than pulling.
Can you remove keratin bond extensions at home?
Yes, with the right tools and products, home removal is possible. You need a keratin bond remover solution, specialized pliers, a fine-tooth comb, and patience to work through each bond without forcing it.
How long does the removal process take?
A full set of keratin bond extensions typically takes 2–4 hours to remove safely. Rushing the process increases the risk of breakage significantly.
Do keratin bond extensions damage natural hair when removed?
Damage occurs when bonds are forced out without proper softening or when household tools are used. Correct technique keeps breakage near zero by directing pressure only at the adhesive.
Can keratin bond extensions be reused after removal?
Keratin tips can be preserved for reuse if the bonds break cleanly and all residue is removed from the hair weft. Proper storage after removal extends the life of the extension significantly.
Recommended
- Professional Hair Extensions Gold Coast: The Ultimate Guide to Luxury – HairLocks Hair Extensions
- Keratin Italian Bond Powder 60Grams – HairLocks Hair Extensions
- How to Make Hair Extensions Look Natural: The Professional Blending Gu – HairLocks Hair Extensions
- CARE SHEET – HairLocks Hair Extensions