


1.5–3 Hours: Remove Nano Beads at Home With Salon Proven Steps
Yes, you can remove nano bead extensions at home if you have the right tools and enough patience. The method is simple to describe: open the flattened bead with grooved nano pliers, then slide the extension out without pulling on your natural hair. If a bead won’t open, you see redness or broken skin, or progress stalls well past the expected time, stop and book a professional instead.
TL;DR:
- Proper removal involves gentle, steady pressure using grooved pliers; forcing beads can crush them and damage natural hair.
- Timing varies from 1.5 to 3 hours per full head, requiring patience to avoid scalp irritation or broken strands.
- When beads won’t open or are crushed, do not pull or force, and consider cutting the bead as a last resort.
- Stop immediately if you experience redness, soreness, or bleeding, and seek professional help to prevent scalp injury.
- After removal, avoid heat styling and tight hairstyles for at least 48 hours to allow your scalp and hair to recover.
Table of Contents
- Nano Bead Removal Tools and Prep Steps to Get Right
- How to Remove Nano Beads Step by Step
- Fixing Stuck Beads, Tangles, and Sore Scalp Mid-Removal
- Aftercare: What to Do With Your Hair Once Every Bead Is Out
- When DIY Removal Isn’t the Right Call
- What 30 Years in the Salon Chair Teaches You About Nano Bead Removal
- Our Take: DIY Removal Has a Ceiling, and That’s Fine
- Book a Professional Nano Bead Removal With HairLocks
- Sources
- FAQ
Nano Bead Removal Tools and Prep Steps to Get Right
Nano bead extension removal is a mechanical process, not a chemical one. No solvent or acetone touches the bead. What actually matters is having the correct pliers and a workspace that lets you see and reach every section of your head without rushing.
Gather these before you start:
- Nano or micro ring pliers with a grooved tip, built to flatten and reopen a bead without crushing it
- A metal tail comb for sectioning and clearing shed hair from around the bead
- Sectioning clips to isolate rows and keep track of what’s done
- A lightweight detangling spray or leave-in conditioner
- A hand mirror plus a well-lit bathroom mirror, since the back of your head is where most people get stuck
- A towel and a small tray or bowl to catch beads as they come free
Skip anything not built for this job. Household pliers lack the grooved tip designed to reopen a nano ring cleanly, and using the wrong tool tends to crush the bead instead of releasing it, which drags on the strands trapped inside. Scissors have no place anywhere near a bead. One slip and you’ve cut natural hair, not just the extension.
Before you touch a single bead, detangle your whole head thoroughly and let your hair dry completely. Wet hair is more elastic and harder to read, which makes it tougher to tell where the bead ends and your own hair begins. Work from the nape upward in small, clipped sections, and keep the room bright enough that you’re not guessing at bead position by feel alone.
Timing depends on how much hair you’re working with. A half head typically takes less time, while a full head and thicker installs take longer to remove, requiring patience and occasional breaks.
Pro Tip: Spray a small amount of detangler directly onto the bead area before you start each row. A little lubrication reduces friction around the ring and makes the pliers grip cleaner on the first try instead of the third.
How to Remove Nano Beads Step by Step
This sequence is what separates a clean, painless removal from one that leaves your scalp sore and your strands frayed. Go slowly through each row rather than rushing to finish the whole head in one sitting.
- Detangle the section. Brush through the row you’re working on so no loose strands are wrapped around the bead before you begin.
- Section and clip. Isolate one row at a time with a clip, working from the bottom of your head upward.
- Identify the bead’s orientation. Look for the flattened metal cylinder close to the scalp, then note which way it’s facing so you can position the pliers correctly.
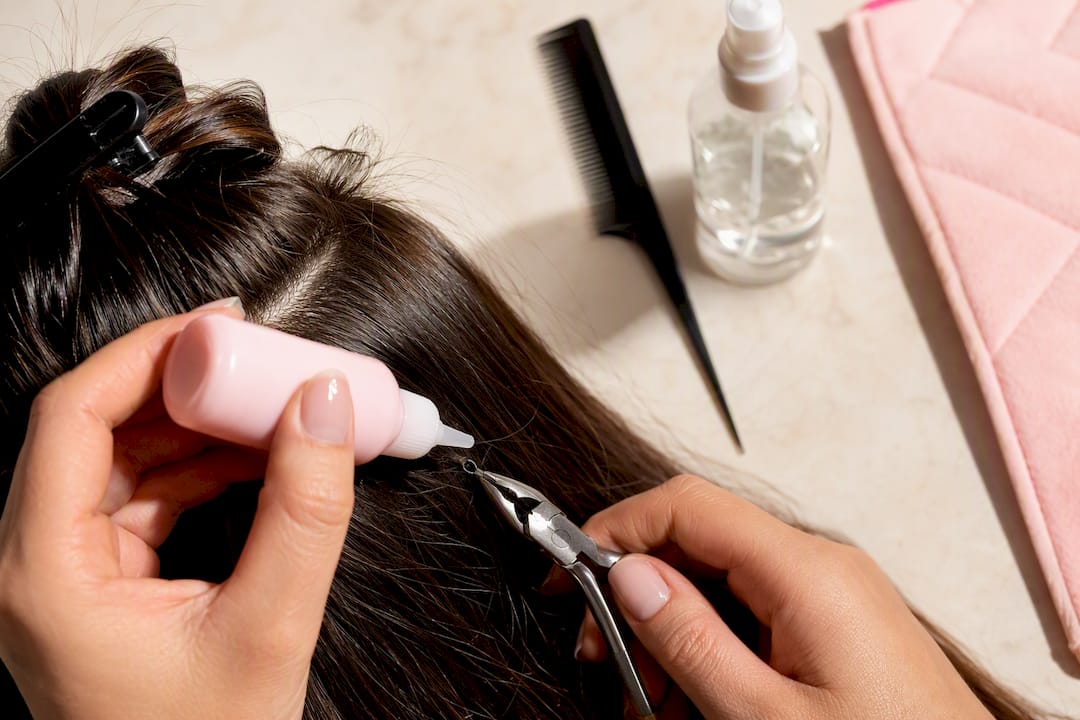
- Position the pliers on the bead. Use the grooved-tip method: line the jaws up with the flattened sides of the ring so the tips sit in the natural indentations rather than gripping the middle.
- Squeeze gently and steadily. Apply slow, even pressure until you feel the bead give and pop back open into a round shape. This should take moderate, not forceful, pressure.
- Stabilize the root with one finger. Hold the natural hair steady just above the bead before you move it, which keeps tension off the scalp as the extension releases.
- Slide the extension down and off. Once the bead is open, ease the bonded strand downward and out rather than yanking it free.
- Check for trapped shed hair. Small knots of shed hair often collect just above an opened bead; work them loose with the tail comb and a touch of detangler rather than tugging.
- Collect the bead. Drop it into your tray immediately so you’re not searching the floor or your hair later.
- Repeat row by row, taking a short break every 20 to 30 minutes to rest your hands and reassess your progress in the mirror.
The two positioning techniques worth knowing are the groove method, where the pliers’ grooved tip cradles the flattened bead directly, and the reverse squeeze, where you angle the pliers slightly off center for beads sitting closer to the scalp where a straight-on grip is awkward. Try the groove method first. Switch to the reverse squeeze only if the bead keeps slipping out of the jaws.
Realistic timing matters here because most short tutorial clips compress hours of work into a 60-second video, which sets up unrealistic expectations. A full, methodical removal can run 1.5 to 3 hours or more depending on how many beads you’re working through and how careful you’re being with each one. That is not a sign you’re doing it wrong. It’s the actual pace of doing it safely.
Pacing yourself protects both your hair and your patience. Work at a comfortable angle, whether that means sitting at a table with a stand mirror or standing in front of a bathroom mirror with good overhead light, and stop for a few minutes any time your hands cramp or your focus starts to slip. Rushed removal is where most damage happens, not the technique itself.
Fixing Stuck Beads, Tangles, and Sore Scalp Mid-Removal
Even with the right tools, things don’t always go smoothly. Here’s how to handle the problems that actually come up.
- The bead won’t open. Reposition the pliers at a slightly different angle, add a touch more detangler for lubrication, and try again with steady, even pressure. Never force it. Repeated hard squeezing on a stubborn bead is more likely to crush it than open it.
- The bead is crushed instead of opened. Do not pull on the extension. A crushed bead can sometimes only be removed by cutting it off with fine embroidery scissors held flat against the bead itself, and this should be treated as a last resort because of how close you’re working to your scalp and natural hair.
- Tangles keep forming around the bead. Work a small amount of oil or leave-in conditioner into the knot, then separate the strands gently with your fingers before switching to the tail comb. Fighting a tangle with a comb alone usually makes it tighter.
- Your scalp gets red, sore, or starts bleeding. Stop immediately. Rinse the area gently, apply basic first aid if there’s a break in the skin, and book a salon appointment rather than continuing.
Pro Tip: If you notice one section fighting you far more than the rest, move to a different row and come back later. A bead that seems impossible after ten minutes of pressure often opens easily once you’ve relaxed your grip and returned with fresh focus.
Aftercare: What to Do With Your Hair Once Every Bead Is Out
Your natural hair has been through a lot of handling by the time the last bead comes out, so the next 48 hours matter more than most people expect.
Start with a wash. If there’s noticeable product buildup or residue from the beads, a clarifying shampoo clears it out more effectively than a regular one. Follow with a deep conditioning mask left in for 15 to 20 minutes to replace moisture the hair lost during months of wear.
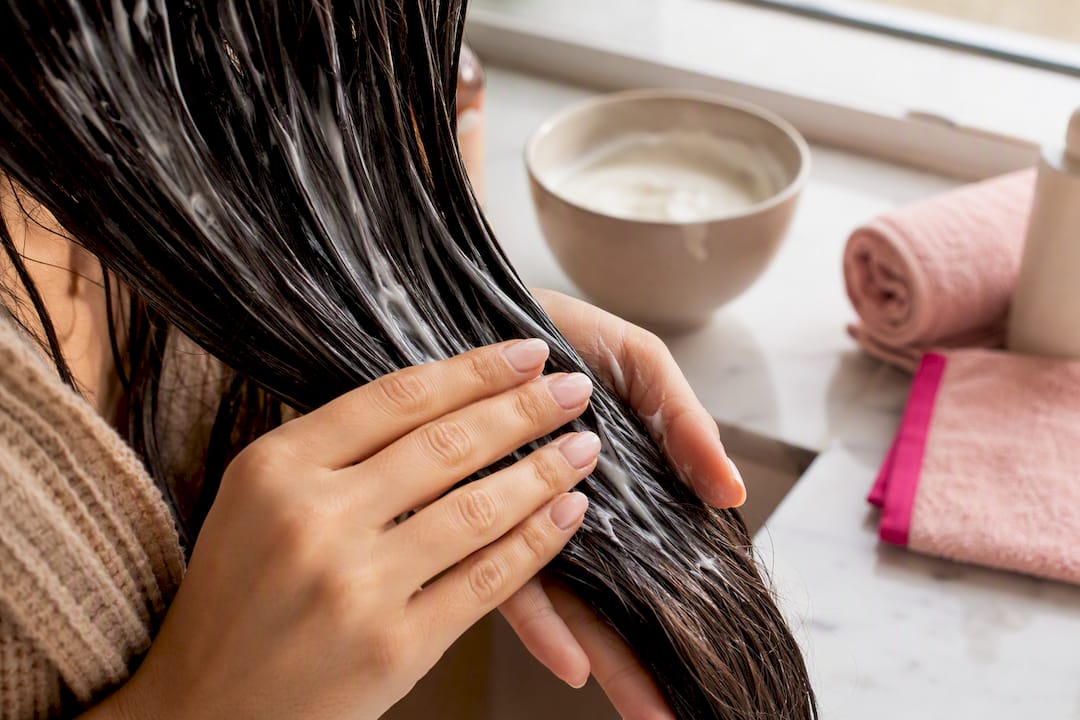
While you’re detangling in the shower, work through the hair with your fingers first to catch any loose shed strands still clinging near the roots, then follow with a wide-tooth comb from the ends upward.
For the next two days, keep a few things off the routine:
- Skip heat styling tools, including blow dryers on high heat, flat irons, and curling wands
- Avoid heavy silicone-based styling products that can weigh down freshly stripped hair
- Hold off on tight ponytails, buns, or braids near the scalp
This is what HairLocks refers to internally as the 48 Hour Rule: give your scalp and strands two full days to recover before subjecting them to heat or tension again. It’s a small window, but it makes a real difference in how your hair looks and feels once you decide on your next step, whether that’s a rest period or a fresh install.
When DIY Removal Isn’t the Right Call
Some situations call for a professional, and recognizing them early saves your hair from unnecessary strain.
- Pain that doesn’t ease up, or redness that spreads rather than fades
- Matting so severe that detangling risks pulling out natural strands along with the bead
- Beads you can’t locate, especially ones that have slipped closer to the scalp than expected
- Progress that’s dramatically slower than the timing guide above, which often signals a technique issue rather than bad luck
- A dense or mixed-method install, where nano beads sit alongside tape wefts or keratin bonds and separating them safely takes trained hands
A salon visit for removal typically includes professional-grade tools, a much faster pace thanks to practiced technique, a deep conditioning treatment folded into the appointment, and honest guidance on whether your hair needs a rest before reinstalling anything.
What 30 Years in the Salon Chair Teaches You About Nano Bead Removal
Salon timing looks different from home timing, and it’s not just about faster hands. A trained stylist works multiple rows simultaneously, reads bead orientation on sight instead of guessing, and rarely needs a second attempt on a single ring. What takes a first-timer three hours at home, an experienced stylist often completes in a fraction of that time.
One habit distinguishes careful professional work: stabilizing the natural hair at the root with a finger before opening any bead.
Always stabilize the natural hair at the root with one finger while opening the bead to avoid hair tension and accidental pulling. It’s a small motion, but it’s the difference between a clean release and a strand that snaps under pressure.
Salons also don’t reuse an opened bead. Once a nano ring has been flattened and reopened, it loses the grip needed for a secure reinstall, which is why professionals replace beads with fresh ones rather than risk slippage down the line. With proper spacing, gentle handling, and regular maintenance checks, nano bead extensions typically hold well between reinstalls, but that longevity depends on removal being done as carefully as the original application.
Pro Tip: Ask your stylist to walk you through bead placement during your next appointment. Understanding how the rows are mapped makes any future removal, DIY or professional, considerably easier to navigate.
Our Take: DIY Removal Has a Ceiling, and That’s Fine
DIY nano bead removal works well for a simple, moderate install and a patient afternoon. There’s nothing wrong with doing it yourself if your hair is in decent shape, your bead layout is straightforward, and you’re not in a rush. The method genuinely isn’t complicated once you’ve done a row or two.
Where the conventional “just watch a 60-second video” advice falls apart is timing and troubleshooting. Most clips skip the part where a bead won’t open on the fourth try, or where shed hair has knotted itself into a small mat you didn’t expect. That’s exactly why a lot of clients who start at home end up booking a salon visit partway through, not because they failed, but because they’d rather hand off the finicky middle stretch to someone who’s opened thousands of beads instead of a few dozen. Both choices are legitimate. The honest answer is that speed, precision, and peace of mind are what you’re paying for with a professional, not some skill you’re incapable of learning yourself.
— HairLocks
Book a Professional Nano Bead Removal With HairLocks
If the idea of spending three hours with pliers and a mirror sounds like more patience than you have this week, a professional removal gets you there faster and with less risk to your natural hair. Experienced stylists ensure beads come out efficiently, roots stay protected from tension, and a deep conditioning treatment is provided after removal.

Removal and reinstallation services range from the Mini Mane through the Signature Full Head and beyond, depending on how much coverage you’re working with, and a personalized consultation can help you decide whether to reinstall right away or take a break with a low-maintenance option like the Top-Lock V Part Topper. Curious what real results look like first? Browse the before-and-after gallery for a sense of what proper application and removal can do. When you’re ready, book a consultation directly through the price list page and let a professional handle the parts a video tutorial never quite prepares you for.
Sources
For related removal guidance, see HairLocks’ notes on keratin bond removal and the 48 Hour Rule for micro beads. For scalp comfort during any extension removal, this stylist-vetted guide to removing faux locs offers useful, transferable technique.
- How to Safely Remove Nano Ring Hair Extensions at Home or Salon - GISTAR Hair
- How to Remove Micro Bead Hair Extensions | 10 Easy Steps (2026)
- How To Remove Nano Hair Extensions?
FAQ
How do I remove nano beads at home?
Detangle and dry your hair, then use grooved nano pliers to squeeze each flattened bead open before sliding the extension out while holding your natural hair steady at the root.
How long do nano beads last in your hair?
With proper spacing and gentle handling, nano bead extensions typically last several months between reinstalls, though individual results depend on hair growth and maintenance routine.
How do I safely remove micro bead hair extensions?
The process mirrors nano bead removal: section your hair, open each bead with the correct pliers, and slide the strand free, budgeting 1.5 to 3 hours or more for a full head.
Does baby oil remove tape extensions?
Baby oil isn’t part of the nano or micro bead removal process described here, since bead removal is mechanical rather than adhesive based; tape extensions rely on a different bonding method that responds to oil based solvents.
How much does professional nano bead removal cost?
Pricing depends on the service and coverage, with options ranging from the Mini Mane to the Signature Full Head listed on the HairLocks pricing page.