


Weft Extensions for Fine Hair: What Actually Works Safely
Weft extensions can work well for fine or thin hair, but only under specific conditions: a lightweight hand-tied or genius-style weft, a conservative row count, and an installation where a trained stylist actively manages weight load on your natural strands. Skip the bulky machine wefts and skip the DIY sew-in. If your stylist can’t explain how they’re distributing weight across your scalp, that’s your answer.
TL;DR:
- Most fine hair can safely support wefts only if the installation uses lightweight, hand-tied or genius-style wefts with conservative row counts managed by an experienced stylist.
- Load control is critical, requiring small, well-placed sections, even weight distribution, and staged installs for better scalp health and longevity.
- Proper placement favors fewer rows near the crown, concentrated in denser areas, with tape-weft hybrids for added fullness without excessive tension.
- Signs of overloading include tight beads, shedding, visible bumps, or scalp soreness, which should prompt immediate adjustments or removal.
- Regular maintenance involving gentle brushing, proper washing, and scheduled move-ups over six to eight weeks helps protect fine hair against damage.
Table of Contents
- What Makes a Weft Fine-Hair-Safe: Construction Types Explained
- How Stylists Manage Load During Installation
- How Much Weight to Add and Where to Place It
- Downsides and Warning Signs You Shouldn’t Ignore
- Daily Care and Move-Up Schedule That Keeps Fine Hair Healthy
- What to Look for in a Stylist Before You Book
- Preparing Your Fine Hair Before Installation Day
- Mistakes That Damage Fine Hair During and After Install
- Hairlockshairextensions’ Approach to Fine-Hair Wefts
- See Real Results Before You Book Your Consultation
- Sources
- FAQ
What Makes a Weft Fine-Hair-Safe: Construction Types Explained
Not all wefts are built the same, and the construction determines whether your fine hair thrives or thins further. Machine wefts, the thick, folded-seam style you’ll find at most drugstores, sit heavy on the scalp and create a visible ridge that fine hair simply can’t camouflage. That’s the version most people picture when they hear “weft,” and it’s usually the wrong choice for thin density.
Hand-tied wefts solve the bulk problem at the construction level. Each track is sewn by hand rather than machine-folded, which produces a flatter seam and a track that curves naturally along the head’s shape instead of sitting in a rigid line. Because the seam has less material, it puts less mechanical strain on the hair it’s sewn to, and it disappears better under thin coverage.
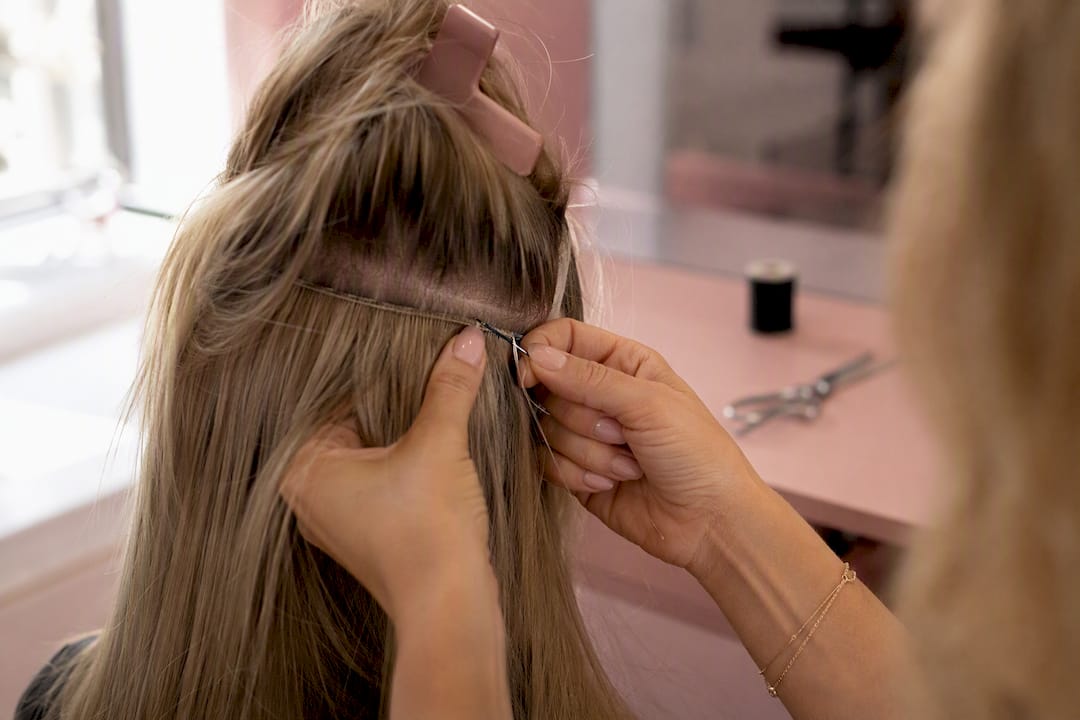
Genius wefts take that thinning even further. The seam on a genius-style weft is engineered to be nearly undetectable by touch, which matters enormously when there isn’t much natural hair on top to hide it. This construction tends to work best for clients adding length and gentle volume without changing their part or crown density dramatically.
Tape-weft hybrids and single-sided tape panels round out the options. Because tape-ins lie flat and spread weight across a wider surface area than a sewn track, they’re often the gentlest entry point for hair that hasn’t worn extensions before. Reported wear time varies with maintenance and can be several months, and single-sided tape reduces the weight further still.
Matching format to goal matters more than picking a “best” option in isolation:
- Root volume: genius or hand-tied wefts placed close to the crown, sewn on the smallest safe sections.
- Mid-length fullness: a single hand-tied row lower on the head, where more natural hair shares the load.
- End weight and movement: tape-weft hybrids, which add fullness without concentrating tension at one seam.
Hairlockshairextensions builds its hand-tied weft line specifically around the flatter, lower-tension construction fine-haired clients need, in double-drawn 22 inch lengths that keep the ends full without adding unnecessary base weight.
How Stylists Manage Load During Installation
Load management is the actual skill that determines whether a weft install helps or hurts fine hair. It means three things working together: the weft lies flat against the scalp, the weight gets distributed across healthy sections rather than concentrated on a few strands, and nothing creates a visible bulge under the surrounding hair. Get any one of those wrong and you’re looking at tension headaches, visible seams, or breakage within weeks.
Successful installs on fine or thin hair come down to load control, smaller attachment points, and precise sectioning far more than they come down to which weft brand is used. A skilled stylist tests this before ever threading a needle.
Here’s what that testing looks like in practice:
- Comb test the section. The stylist combs through the intended row to check density and confirm there’s enough healthy hair to bear a track without pulling on weak strands.
- Set section width in finger-widths, not inches. Narrower subsections, roughly the width of one or two fingers, spread the sewing points across more hair rather than loading a single thick strand cluster.
- Check elevation consistency. Each row should sit at the same angle and height as the one before it, so weight transfers evenly instead of stacking on the lowest track.
- Sew beside beads, not through them. Shallow needle passes that sit adjacent to a bead rather than piercing through it reduce grip pressure at the anchor point, which matters for future move-ups.
- Reassess after row one. Before adding a second row, the stylist checks how the scalp and hair are handling the first track’s weight.
For clients with uneven density, hybrid installs often outperform an all-weft approach. Sewn wefts go into the denser back and crown zones where there’s more hair to share the load, while micro bonds or nano rings handle the thinner front hairline, where a sewn track would pull too hard on too little hair.
Pro Tip: Ask your stylist to stage your install across two visits. Start with one row, wear it for a week, and let both your scalp and your styling routine adjust before adding more. Start with one row, wear it for a week, and let both your scalp and your styling routine adjust before adding more. It’s far easier to add a second row later than to remove damage caused by going too heavy on day one.*
This staged, load-tested approach reflects the kind of hands-on technique Michele has refined over 30 years working with fine and thinning hair types at Hairlockshairextensions, and it’s the standard the brand trains every consultation around.
How Much Weight to Add and Where to Place It
Most fine-haired clients do best with one to two lightweight rows total, not the three or four rows a thicker-haired client might comfortably wear. That’s not a hard rule. Someone with moderately fine but dense hair might tolerate a bit more, while someone with genuinely sparse hair might do better with a single row plus a topper for coverage elsewhere.
Stylists typically talk about weight in grams per row rather than total install weight, and the honest answer is that the right number depends on your specific density, the weft construction, and how much natural hair sits in that section. Rather than chasing a precise gram figure, focus on the principle your stylist should be applying: enough weight to add visible fullness, not so much that the row pulls on the scalp when you shake your head.
Placement matters as much as row count:
- Horseshoe row at the back: the most common placement, following the natural density curve from ear to ear across the lower crown, where hair is usually thickest.
- Selective face-frame pieces: small, individual pieces near the temples rather than a continuous row, since hairline hair is almost always the finest on the head.
- Brick-lay spacing between rows: offsetting the attachment points row to row so seams don’t stack into one visible column when hair is styled up or wet.
If you’re aiming for both length and noticeable volume, a staged install across two appointments usually beats one large session. It gives your scalp time to signal whether it’s handling the current load well before more weight gets added, and it gives you real-world feedback from a week of sleeping, washing, and styling with the extensions in.
Downsides and Warning Signs You Shouldn’t Ignore
Wefts carry real risk for fine hair when they’re installed without the load-management discipline described above. The most common problems are traction damage at the attachment points, visible seams that no amount of styling can fully hide, scalp soreness that shows up a day or two after install, and general discomfort with upstyles or sleeping on your side.
Know the difference between normal adjustment and an actual problem:
- Beads or ties that feel tight from the first day. Some awareness of new weight is normal; sharp pulling or a headache-like tightness at the crown is not.
- Hair pulling out when you gently tug near the anchor. A small amount of shed hair is expected; noticeable strands coming out at the root during the first week signals overload.
- A visible ridge or bump under styled hair. This usually means the weft was too thick for your density or the row was placed too high.
- Concentrated shedding at one anchor point rather than spread evenly. This points to uneven load distribution, often from sections that were too wide.
If any of these show up, don’t wait it out. Ask for the row to be adjusted, reduced, or removed.
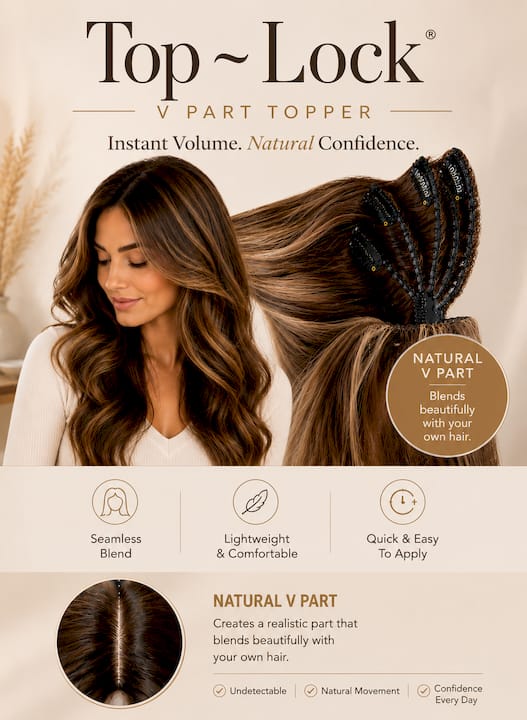
For hair too sparse to safely carry any sewn row, lightweight tape-ins, individual micro bonds, or a topper like the Top~Lock V‑Part are the better call, particularly when thinning is concentrated at the crown or part line rather than spread across the whole head. Before committing to wefts, insist on a staged plan, ask to see and feel sample pieces, and get a clear move-up schedule in writing.
Daily Care and Move-Up Schedule That Keeps Fine Hair Healthy
Fine hair extensions live or die by daily habits, not just the quality of the install. Holding the base while brushing and detangling from the ends up toward the roots prevents the tugging that loosens anchors prematurely.
Build these habits into your routine from day one:
- Use sulfate-free, extension-safe shampoo and conditioner, applied gently at the scalp and worked through rather than scrubbed.
- Apply heat protectant before any styling tool touches the wefted sections, since fine natural hair burns faster than the extension hair itself.
- Keep upstyles loose. Tight ponytails or buns concentrate pull directly on the attachment points.
- Never sleep with wet extensions. Dry fully first, then switch to a silk pillowcase or a loose braid to cut down on friction overnight.
Pro Tip: If you wake up with tangles concentrated right at your wefts rather than throughout your hair, that’s a sign the row needs adjusting, not just more careful brushing.
Professional check-ins every six to eight weeks keep weight distribution correct as your natural hair grows and the attachment point shifts away from the scalp. Skipping move-ups is the single most common reason fine-hair installs fail early, since a track that once sat flat against the scalp gradually hangs lower and heavier as new growth pushes it down. Wefts that are properly maintained and moved up on schedule can typically be reinstalled multiple times, which meaningfully lowers the long-term cost compared to buying new hair for every appointment.
What to Look for in a Stylist Before You Book
A consultation should feel like an assessment, not a sales pitch. A stylist qualified to work with fine hair will run an actual density test, show you how they plan to section your head, and have a portfolio of real fine-hair installs, not just thick, dramatic transformations.
Bring these questions to your appointment:
- How do you plan to manage load on my specific density?
- Which weft type do you recommend for my hair, and why that one over the alternatives?
- What does my maintenance schedule look like, and who performs my move-ups?
- Can I see or feel a sample weft before we start?
Walk away from anyone who pressures you into a bigger install than you asked for, can’t produce fine-hair examples, or gives vague answers about weight and placement. A solid consultation checklist protects your natural hair before a single track goes in.
Preparing Your Fine Hair Before Installation Day
What you do in the weeks before your appointment affects how well a weft holds and how much stress your scalp handles once it’s in. Start by getting a trim if your ends are damaged or excessively thin. Weak, splitting ends make poor anchor points and shed faster under any added tension.
Deep-condition your hair for two to three weeks leading into the install, focusing on scalp health as much as strand strength. A healthy scalp handles the pressure of a new track far better than one that’s already irritated or overly oily. If you regularly color or chemically treat your hair, schedule that service at least two weeks before your extension appointment rather than the day before. Freshly processed hair is more fragile and more prone to breaking under the tension of a new weft.
Wash your hair the day of your appointment, but skip heavy conditioners or styling products that leave residue. Clean, product-free hair gives the stylist a clearer read on your true density and gives any tape or sewn track a cleaner surface to grip. Arrive with your hair dry and in its natural texture; wet or damp sectioning can lead to inaccurate load calculations once it dries and shifts.
Finally, be honest during your consultation about any recent hair loss, scalp sensitivity, or past extension damage. That information changes the row count and placement plan your stylist should build for you.
Mistakes That Damage Fine Hair During and After Install
The most common mistake is choosing row count based on desired volume rather than actual density. Wanting more fullness doesn’t mean your hair can safely carry more rows, and stylists who prioritize the look over the load are setting fine hair up for breakage.
A second frequent error is letting move-up appointments slide. Once a track has grown out and hangs lower on the strand, it pulls with more leverage than it did on install day, even though nothing about the weft itself has changed. Waiting an extra month or two “because it still looks fine” is exactly when damage accumulates unnoticed.
Overusing dry shampoo at the root to avoid washing near the wefts is another mistake worth naming. It builds up at the attachment points, which can actually increase friction and tangling rather than reduce it. Wash on schedule with extension-safe products instead of skipping washes altogether.
Finally, many clients brush from the root down, dragging a brush straight through a tangle without supporting the weft base. That yanks directly on the anchor point. Detangle from the ends first, work upward gradually, and always hold the base of the track with your free hand while brushing near it. Small habit, outsized protection for hair that doesn’t have much margin for error to begin with.
Hairlockshairextensions’ Approach to Fine-Hair Wefts
Michele has spent 30 years refining how weft installs work on fine and thinning hair, and that experience shapes every consultation Hairlockshairextensions runs: density testing first, product recommendation second. We favor lightweight, hand-tied constructions and hybrid placements over one-size-fits-all rows precisely because fine hair doesn’t forgive shortcuts. If you’re weighing your options, our gallery shows what conservative, well-managed installs actually look like on real fine-hair clients.
See Real Results Before You Book Your Consultation
Hairlockshairextensions gives fine-haired clients something most extension providers skip: a consult-first process built around your actual density, not a standard package sold to everyone. Every recommendation starts with a real assessment of what your hair can safely carry, whether that means a hand-tied row, a hybrid install, or a topper instead of a full weft.

Our offerings built specifically with fine and thinning hair in mind include:
- The hand-tied Genius Weft, double-drawn for fullness without base bulk.
- The Top~Lock V-Part Topper, for localized thinning at the crown or part line.
- One-on-one consultations that assess your density before recommending any product.
Browse our before-and-after gallery to see how staged, load-managed installs look on hair like yours, then book a consultation so we can build a plan around what your hair can actually handle, not a generic package.
Sources
- Hair extensions for thin hair — StyleSeat
- Best hair extensions for fine thin hair — Conde Professional
FAQ
Are weft extensions good for thin, fine hair?
Yes, when the weft is a lightweight hand-tied or genius-style construction and a trained stylist manages load through conservative row counts and precise sectioning. Bulky machine wefts installed without that care are the version that causes damage.
What type of weft hair extension is best for thin hair?
Hand-tied and genius wefts are generally the best fit because their flatter, thinner seams put less strain on individual strands, while tape-weft hybrids offer an even lower-tension alternative for very sparse density.
What are the downsides of weft extensions?
The main risks are traction damage at attachment points, visible seams under thin coverage, scalp soreness, and discomfort with upstyles or sleeping, all of which become more likely without proper load management and regular move-ups.
Is a weave good for fine hair?
A traditional, bulky machine-sewn weave is usually a poor match for fine hair because of its thick seam and concentrated weight, but a thin, hand-tied weft installed with careful sectioning can work well for many fine-haired clients.
Recommended
- Weft Extensions Pros and Cons: What You Need to Know – HairLocks Hair Extensions
- Best Extensions for Fine Hair: Safe Methods That Work – HairLocks Hair Extensions
- Extensions for Damaged Hair: Safe Choices That Work – HairLocks Hair Extensions
- Extension Friendly Hair Products: Your 2026 Australia Guide – HairLocks Hair Extensions